I build my frist Guitar last autumn with Wolfgang Teller in a three days workshop. He pre-built the soundboard with the rosette, sides where glued to the head and tail block, the raw shape of the neck was cut and glued already.
Now I wanted to build a guitar from scratch and starting with a small instrument seemed to be a good idea. I always wanted a tenor ukulele and I also was curious about how a pure koa instrument would sound like. I decided to build only with hand tools, so now circular saw, no band saw, no planer (the decision was easy - I don't have any of these machines, but I was impressed by many youtube videos from luthiers who deliberately craft with hand tools). This was before I knew how challenging it would be to plane a peace of dry koa from 5 millimeters to 1.5 millimeters.
I was looking for templates and found a nice one with v-bracing another thing I was curious about.
So I started looking for wood and also started to build the mold.
The sides
When I planed the sides to 2 mm, I didn't dare to go to far with the plane and rather sanded them down from 3 mm, which was a lot of sanding.
I pondered a lot whether I should buy or build the bender and finally decided to build one myself. It turned out that the wood began to carbonize during bending, so I switched over to a more basic variant, which worked fine.
I failed to bend the initially planed cutaway body and dropped it in favor of a classical shape. Bending so far was the biggest challenge.
Learning: I did a rather bad job and I have to train it much more. Don't start with very hard wood like koa! Work with the scraper before bending, the wood might crack from the cuts from planing.
I moved on with the head and tail blocks.
Learning: Measure twice! I had to cut the head and tail blocks two and tree times, before I finally got them right with all angles.
I planed the sides so that they meet with the head and tail level
I was ambitious to cut slotted linings myself. I took me a while to get them nice (better don't look to close), unfortunately I learned to late how I add a depth stop to the saw blade. You find a lot of examples from luthiers using cloth spins with rubber band as clamps for the lining. Works nice!
I reached the first stage with a lot of learning
The back
I felt more experienced with the plane and went down to 2.2 mm with the plane and used the scraper and sanding paper to get to 2 mm. For glueing the bookmatches I used the traditional method of light pressure in a slightly too narrow setup.
I added extra lining to the joint,
cut out the back
added the bracing
And did some final tweaking with the chisel and rounded the bracing with the plane and sanding paper.

T
I reached stage 2
I decided to already glue the back to the sides at this stage. I had my concerns in putting everything together in one go.
I also build the clamps from a threaded rod and a wooden staff.
The soundboard
Getting down to 1.5 mm worked well despite my worst fears. But I had difficulties not to leave bad marks in the wood and I am afraid it might come from a blunt blade.
Learning: Grind the blade of the plane more often!
The rosette
The rosette kept me awake at night. I mad a couple of trials before I dared to cut the channel into the soundboard.
First draft:
Second draft:
Finally I decides to go with my first template.
The bridge
That was fun! I cut two channels with the router and did the rest with the chisel.
Before (left) and after:
Cutting the channels with the router:
Almost done:
Fits in:
That was annoying, the drill broke and it was quite an operation to get out and close the cut again. I did that operation from the bottom of the bridge so it's not visible after the bridge is glued to the top.
The neck
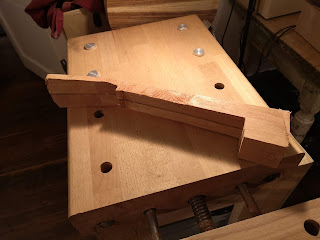
I cut the nut with the router holding the body in a jig I build before
The neck block
The neck after cutting and gluing the head
Working on the neck with chisels, rasp, cutter

The binding
Due to the uneven sides I had difficulties to cut the channels for the binding with the router. I ended up with a mixture of a router cut from the top and a knife cut from the side with a home made channel cutter (right to the body)
The fret board
I gave the fret board a light radius of 22'', glued the frets and leveled them with a self-made file holder. The channel I cut with the Japanese saw where rather wide for thin slim frets, so no hammering was requited and I pressed the in the slot with clamps.
I added a dot on the 5th and two on the 12th fret.
Learning: Better prepare the neck and the fret board before glueing it together. They didn't perfectly fit.


